When you think about roof leaks, what first comes to mind? If your property has a sloped roof, maybe you think of water infiltrating through missing or damaged shingles. On the other hand, if you have a flat roof, maybe you jump to the waterproofing value of various sealants. Or, if you’re 90% of people, you don’t know or care about any of that!
In any case, the most leak-prone point on any roof is one that often is not top of mind: transitions. If not properly protected, the edges, seams, and corners of your roof provide ample room for water to slip beneath your shingles and membrane and into your roofing assembly, causing leaks and water damage.
That’s whereroof flashing comes in. If installed correctly, it seals out water where materials like walls, drains, and equipment meet, preventing costly repairs down the line; if installed poorly, it can turn a minor leak into major water damage. So, what exactly is flashing, and how can you make sure it’s protecting your building year after year?
Table of Contents
Quick Answer
Flashing is the metal or membrane material that directs water away from vulnerable joints and seams. Follow these flashing tips to extend your roof’s lifespan and avoid costly repairs:
- Start with the right materials:Use manufacturer-approved sealants and membranes for lasting performance.
- Prioritize proper termination:Ensure term bars, counter flashing, or surface-mounted flashing securely seal wall flashings.
- Plan for movement:Incorporate flexible expansion joints made from EPDM or neoprene to handle thermal expansion.
- Keep drainage in mind:Use drip edge flashing, drain sumps, and scuppers to prevent ponding water near vulnerable areas.
- Protect roof penetrations and chimneys:Seal 90° transitions around vents and chimneys with base, counter, or liquid-applied flashing.
- Inspect and maintain regularly:Check for loose fasteners, cracked caulk, and debris at least once a year.
- Follow manufacturer guidelines:Ensure all installation and repair methods comply with manufacturer standards to protect your warranty.
By installing and maintaining flashing correctly, you’ll keep your commercial roof watertight and worry-free for years to come.
Looking for Commercial Roof Flashing Services?
What Is Roof Flashing?
Roof flashing is the thin layer of membrane or metal (in most cases, galvanized steel) that seals gaps and transitionson your roof, preventing water from infiltrating these vulnerable points. Areas around chimneys, vent pipes, skylights, and similar installations on your roof most likely already have flashing.
Common flashing types include the following varieties.
Base Flashing and Counter Flashing
These two roof flashing types work together to form a watertight sealwhere the roof meets a vertical surface,such asa wall or chimney, on a flat roof. Base flashing sits at the bottom, attached to the roof membrane horizontally, while counter flashing overlaps it vertically from above (often embedded into masonry) to protect the joint from rain and UV exposure. Together, they prevent water from slipping into the roofing system and causing leaks at critical transition points.
Drip Edge Flashing
Installed along the edges of the roof, drip edge flashingkeeps rainwaterfrom running behind the fascia, the horizontal board running along your exterior wall below your roof’s edge. It directs waterstraight into the gutters, protecting both the roof deck and siding from rot or staining.
Fluid- or Liquid-Applied Flashing
A modern alternative to metalflashing, fluid-applied flashing is a waterproof coating that cures into a flexible, seamless membrane around transition points. It is most commonly usedonflat roofs with membrane systems, since wateris more likely to pool without a slope directing it downward. Liquid-applied flashing is ideal where rigid flashing can’tfitor whereseams needs continuous protection.
Roof Coping
On commercial buildings with parapet walls, roof coping serves as the protective cap that seals the wall’s top edge. Most often made from 24-gauge metal, coping prevents waterfrom infiltrating through joints in the masonry beneath. It can also serve aesthetic purposesby offering the parapet wall a more finished look, especially if made of specialty materials like copper or stone.
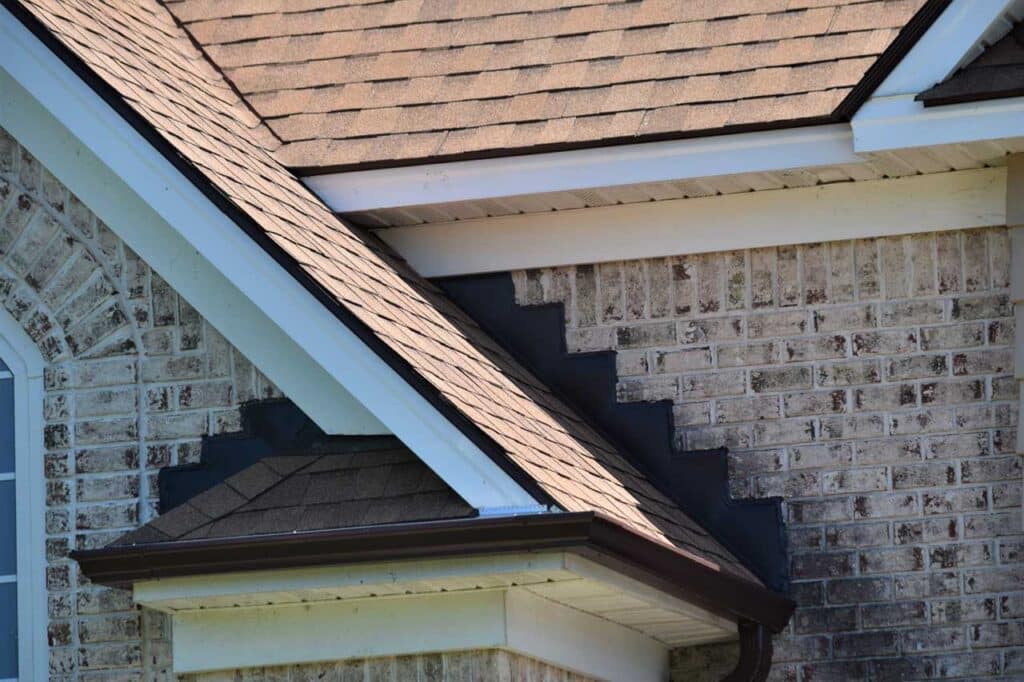
Step Flashing and Kickout Flashing
Used where a roof meets a wall or dormer on a sloped roof, step flashing consists of overlappingL-shaped metal piecesinstalled with each shingle course. Each “step” directs water safely down the roof rather than letting it pool along the wall.
At the bottom of the run, kickout flashing plays a crucial finishing role by channeling water away from the sidingandinto the gutter. Without it, runoff can seep behind the wall and cause hidden structural or moisture damage.
Valley Flashing
Where two roof slopes meet, roofing contractors install valley flashing at least partially beneath shingles (with some metalsurface remainingexposed) to guide waterdown the intersection and into the gutter system. It’sone of the highest-volume drainage pointson any roof, so it needs to be sealed and secured carefully to avoid leaks.
That was a lot, right? In any case, now that you’rean expert on roof flashing, let’smove on to the tips you need to revolutionize your roof.
Tip 1: Always Start with the Right Materials
Quality begins with the right materials. For most commercial buildings, 24-gauge face metalflashing is standard. Beneath it, a lock strip(one gauge heavier) connecting adjacent panels should be fastened every four inches on center to prevent the metal from flexing or lifting in strong winds.
Also, as we’ve discussed, many membrane-based roofing systems like TPO, PVC, and EPDM use liquid- or fluid-applied flashing instead of metal. If you have a membrane-based flat roof, make sure all flashing components are compatible with that specific membrane. Mixing chemically incompatible materials (for example, using PVC sealant on TPO) can cause leaky sealsthat void your warranty.
Pro Tip:It’s best to hire a licensed commercial roofing contractor to handle the flashing application process, minimizing the chance of any costly issues with faulty installation down the road. However, if you’re committed to DIY application, be sure to stick with manufacturer-approved sealants and flashing kits to ensure long-term performance and compliance.
Tip 2: Pay Attention to Termination
Of course, even the best flashing can fail without secured upper edges, which are often vulnerable points for water infiltration. Properly installed termination ensures that water always meets a flashing surface that carries it safely away from the roof-to-wall transition. Here are the three most important termination details you need to be aware of:
- Termination bars:Also known as “term bars,” these are aluminum bars used to secure the top edge of wall flashing. Many feature a small caulk tray, or “kick,” that shields polyurethane chemical sealants from UV radiation, extending their service life.
- Embedded counter flashing:We already discussed counter flashing near the beginning of the article, but it serves an important termination purpose. When counter flashing is set into masonry, it usually eliminates the need for a separate termination since the overlapping metal naturally sheds water away from joints.
- Surface-mounted counter flashing:Installed directly over the face of masonry when cutting into it isn’t possible, this option achieves the same watertight seal as standard counter flashing or term bars.
In all three cases, these methods maintain a continuous, watertight barrier along the upper edge of flashing. That way, water can’t infiltrate the area beneath, preventing costly water damage and leaks in the long term.
Tip 3: Account for Building Movement
Buildings expand and contractas temperatures change, especially in regions with wide seasonal or daily temperature swings. In the Southeastern U.S., for example, areas between the Atlantic Coast and the Appalachian foothills often experience these fluctuations, combined with high humidity and strong storms that push roofing materials to their limit.
To prevent cracking and separation, flashing must be designed to move with the building. Expansion jointsmade from flexible materials such as EPDM or neoprene help absorb movement where roof planes meet. If tearing does occur, apply replacement patches made from uncured EPDM, which remain flexible and can maintain your watertight seal.
Tip 4: Keep Drainage and Slope in Mind
Ponding wateris flashing’s worst enemy, since it increases the chances of water slipping underneath and creating leaks. With that in mind, proper slope and drainage keep water away from seams and joints.
- Drip edge flashingdirects runoff away from fascia and cleanly into gutters, just like we discussed before.
- Drain sumpsaround roof drains help collect water efficiently by providing a depressed slope that directs water toward the drain.
- Secondary drains and scuppersact as backups during heavy storms. This keeps your roofing system from being overwhelmed during inclement weather.
- Weep holesin brick walls let trapped moisture escape, preventing internal rot and mold caused by moisture buildup.
If you see ponding near a flashing line, the flashing may not be your main issue. Be sure to check your drainage systemto confirm it’s working properly.
Tip 5: Be Conscious of Chimney Flashing
Every vent, pipe, and chimney needs its own watertight flashing detail, since 90° transition points provide ample opportunity for water infiltration. Like we discussed before, standard chimney flashingusually combines base flashing at the roofline with counter flashing in the brickwork to stop water from running down the sides.
For other penetrations, however, you should use liquid-applied flashingto form a continuous seal that can accommodate any shape. This is especially true around irregular shapes or where mechanical units sit close together (for example, HVAC units).
Tip 6: Inspect Flashing Regularly
Flashing problems often begin with minor issues: a loose fastener, lifted edge, or cracked bead of caulk. Of course, these headaches can quickly escalate if left unchecked. Regular roof inspections help catch these small defects before they turn into costly repairs.
Ideally, have a professional roofing contractor inspect your roof twice a year, in spring and fall, though once annuallyis the minimum recommendation. If two professional inspections aren’t feasible, make a point to visually check your roof yourself between professional visits to spot any obvious damage or wear.
If you’re doing a DIY inspection, look for:
- Loose fastenersor bent metal edges
- Cracked sealant around terminations
- Debris blocking drains or scuppers
If you find an issue, avoid quick, low-effort repairs that don’t last. Properly applied patches or replacement sections extend your roof’s service life and protect your warranty. So, when in doubt, reach out to alicensed contractorto handle any repair work your property needs.
Tip 7: Follow Manufacturer Guidelines (and Make Sure Your Contractor Does Too)
Every commercial roofing material manufacturer provides detailed instructions for how their systems should be flashed, sealed, and terminated. These guidelines are crucial, since adherence to them by the letter is usually required to maintain warranty coverage.
Because of that, a reputable contractorwill:
- Follow the manufacturer’s published details for each flashing condition.
- Use only approved adhesives, fasteners, and sealants.
- Document any field modifications in writing.
If your contractor deviates from these requirements or substitutes materials to cut costs, it canlead to premature failuresand void your warranty. So, always confirm that your roofing crew isfollowing the manufacturer’s installation guideto the letter.
In the same vein, only seek out local roofing contractors that will still be around if any installation issues arise. That is to say, avoid “storm chasers”that come into your community after inclement weather, then skip town before they can face accountability for their improper installation.
Frequently Asked Questions (FAQs)
Roof flashing is a thin layer ofmetal or membrane that seals areas on your roof where water could otherwise sneak in, such as seams and joints. For instance, this system is commonly found around walls, chimneys, vents, and roof edges. By directing water away from these vulnerable areas, flashing helps prevent leaks and extends the lifespan of your roofing system.
How flashing is attached depends on the type. For example, metal flashing is typically secured with corrosion-resistant fasteners or clips, while membrane-based flashing is adhered with compatible roofing adhesives. In either case, the key is maintainingcontinuous, watertight overlap at every joint to prevent water infiltration.
Small flashing issues, such as loose fasteners or cracked sealant, can often be repaired by cleaning the area, reapplying high-quality roofing caulk, or tightening screws. However, more serious problems such as corrosion or torn membranes should be handled by a professional contractor to ensure the repair integrates properly with the existing roof system; otherwise, you may face even more problems stemming from faulty repair later down the road.
Flashing on a metal roof is typically made from the same metal as the roof panels and secured beneath overlapping seams. At walls or penetrations, we use sealant to create a tight, waterproof bond. All fasteners should be corrosion-resistant and carefully installed to avoid warping or leaks.
Counter flashing is the upper layer of a two-part flashing system used at roof-to-wall transitions. It overlaps the base flashing to form a watertight seal and is often embedded into masonry. Its job is to shed water over the base flashing, preventing moisture from entering the roof assembly.
We seal roof flashing using high-quality, UV-resistant roofing caulk or sealant. For metal flashing, we apply a continuous bead along seams or fastener heads to keep water out. Similarly, we use manufacturer-approved adhesives or lap sealants in membrane systems. In either case, annual (or preferably, biannual) inspections are essential to ensure the sealant remainsflexible and intact over time.
Final Thoughts
Flashing might seem like a small detail, but it’s your commercial roof’s frontline defense against leaks. When designed and maintained properly, it directs water safely off the roof and away from vulnerable seams, preserving the integrity of the entire roofing system.
So, by choosing the right materials, installing them correctly, and ensuring your contractor follows manufacturer standards, you’ll keep your commercial roof watertight and worry-free for years to come.
Baker Roofing: Commercial Roofing Services Throughout the Southeast
Are you having flashing issues? For over 110 years, Baker Roofing has provided premium flashing inspection, repair, replacement, and installation services throughout the Southeast. We provide quality work that only a century of experience can guarantee. So, if you want peace of mind about your property’s roof, schedule a free estimateusing the button below.
More Information on Flashing